Your support team needs a chat widget live before the next campaign, but the website has three templates, a caching layer, and a consent banner that nobody wants to break. The obvious approach is to paste a script and hope for the best. The reliable approach is almost as quick, but it treats the widget as a small production deployment, not just a line of HTML.
Modern widgets usually arrive as a generated embed snippet. You customize the component, copy the code, add it to a shared site location, and verify how it behaves across browsers, devices, performance tests, and consent states. That copy-paste model has a long technical lineage, reaching back to early web applets and desktop widgets, while current documentation shows the same basic flow of customization, code generation, and embedding across pages (Clepher's overview of website widgets).
Table of Contents
- Why Adding a Widget Is Easier Than You Think
- How to Embed Your Support Widget With a Single Script Tag
- Platform Specific Ways to Add a Widget to WordPress and HTML
- Customizing Your Widget to Match Your Brand and Workflow
- Keeping Your Widget Fast and Conflict Free
- Final Checks and Troubleshooting Before You Go Live
Why Adding a Widget Is Easier Than You Think
A website widget is a self-contained interface component delivered by a script, iframe, or similar embed mechanism. A support widget might render a chat launcher, open a conversation panel, load knowledge from a remote service, and pass messages to an agent platform. Your site provides the placement and page context, while the widget provider supplies most of the interface and application logic.
That separation is why you usually don't need to create a new backend, build a chat interface, or modify every page individually. You add a small bootstrap snippet to a shared layout, and the widget can appear wherever that layout is used. The U.S. Census Bureau treats widgets as a reusable publishing format for third-party websites, including iframe examples with fixed dimensions such as 331 by 480 pixels, which shows that embeds support public data delivery as well as commercial use (U.S. Census Bureau widget documentation).
What happens after you paste the code
The first load typically fetches a lightweight starter script. That script identifies the widget configuration, then requests the assets needed to render the visible component. The exact implementation varies, but the practical workflow is consistent:
- Embed: Put the generated snippet in a shared location.
- Customize: Adjust appearance, behavior, and content sources in the provider dashboard.
- Verify: Test the live result instead of assuming a successful publish means a successful integration.
This makes the change relatively reversible. If the widget causes a conflict, removing the snippet or disabling the deployment usually restores the previous page behavior. That doesn't eliminate the need for testing. A badly loaded third-party script can still slow rendering, collide with site styles, or load before a visitor has given the required consent.
The important mindset shift is simple. You're not undertaking a major application build, but you are introducing external code into a production page. Keep the initial snippet minimal, load the heavier parts only when appropriate, and verify the result on the actual templates visitors use.
How to Embed Your Support Widget With a Single Script Tag
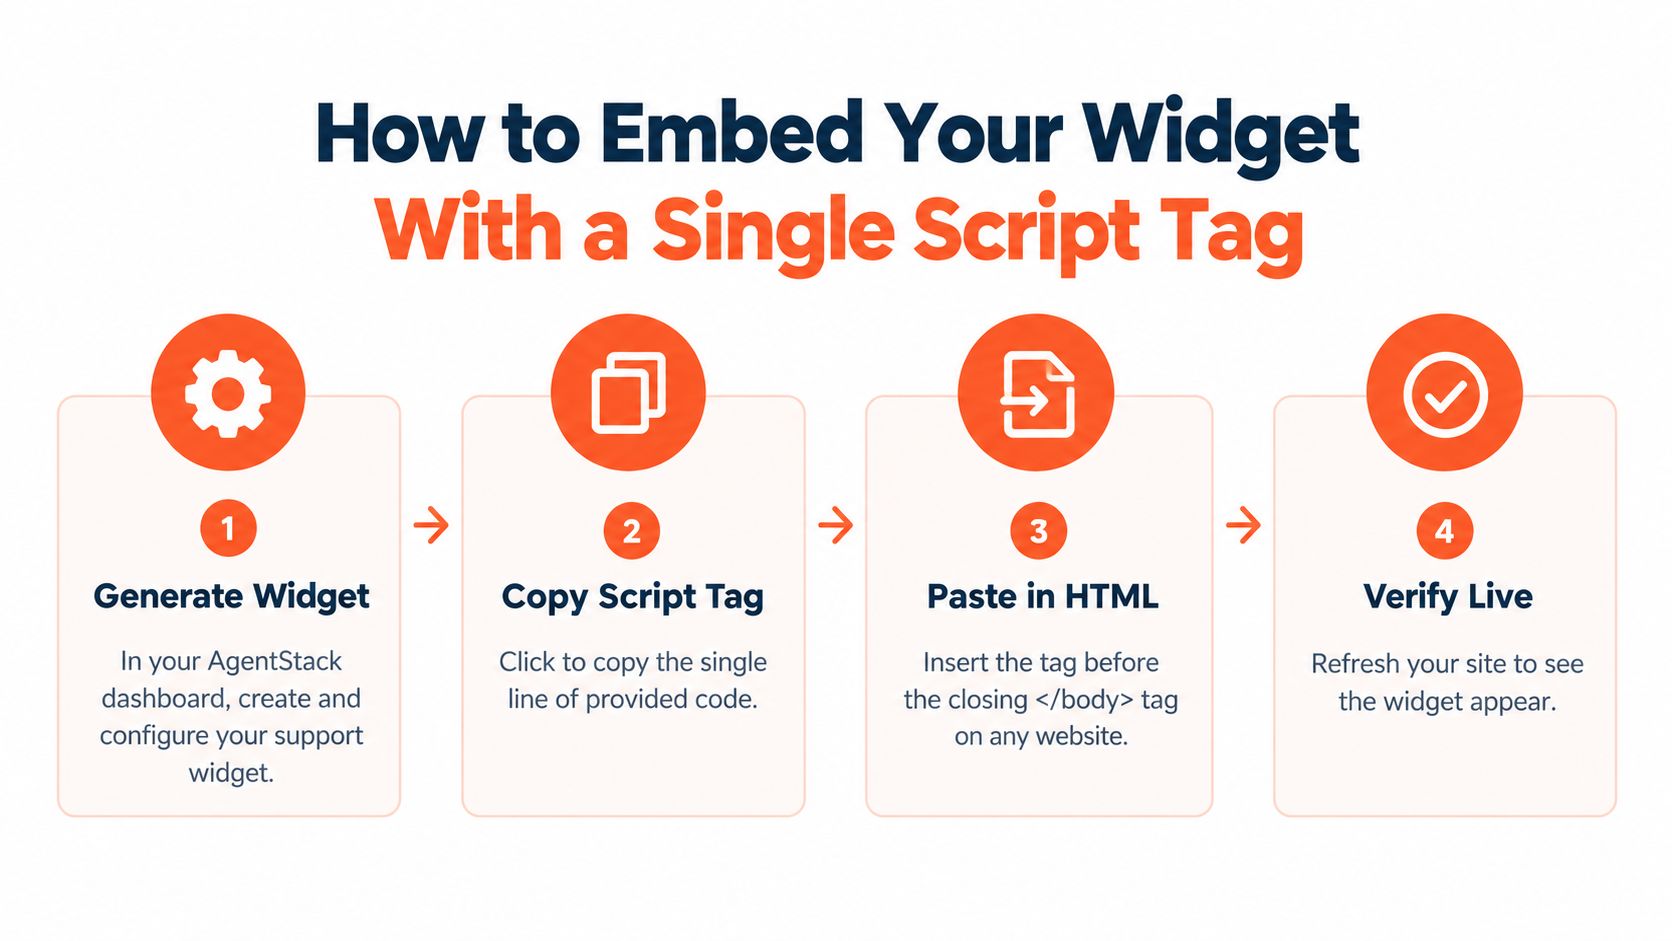
The universal installation flow is straightforward. In AgentStack, create and configure the support widget, copy the generated script tag, place it in the site's shared HTML, publish, and test from a clean browser session. The same pattern applies to many widget providers, even when the dashboard labels differ.
Follow the deployment sequence
-
Generate the widget. Configure the assistant, launcher, greeting, appearance, and deployment settings in the provider dashboard. Confirm that the widget is enabled for the site or environment you're publishing.
-
Copy the complete script tag. Don't retype it or remove attributes that look unfamiliar. A deployment snippet often carries the widget identifier and loading logic the service needs.
-
Paste it after core first-party tags. The practical default is before the closing
</body>tag in the shared layout, after the site's essential first-party scripts. The AgentStack embed widget documentation covers the provider-specific installation details. -
Publish the shared template. If your CMS has separate staging and production environments, publish to staging first. If the site is static, update the shared footer or layout include rather than adding the code to one standalone page.
-
Test in an incognito window. A private session helps avoid cached scripts, existing cookies, and an administrator session that may hide a permissions or consent problem. The widget should appear without requiring a hard refresh, and its launcher should open a conversation rather than producing a console error.
Use one deployment pattern for related embeds
A shared layout is also useful when you later add review, rating, or conversion components. If you're comparing those options, this guide to types of social proof widgets is a useful reference because it distinguishes common widget formats by the kind of trust signal they display.
Don't paste the snippet into a page builder text block unless that is the platform's documented method for loading site-wide scripts. Page-level placement creates an easy failure mode, the widget works on the landing page but disappears from pricing, documentation, or checkout pages. A shared footer or layout include gives you predictable coverage and a single place to remove or update the deployment.
Platform Specific Ways to Add a Widget to WordPress and HTML
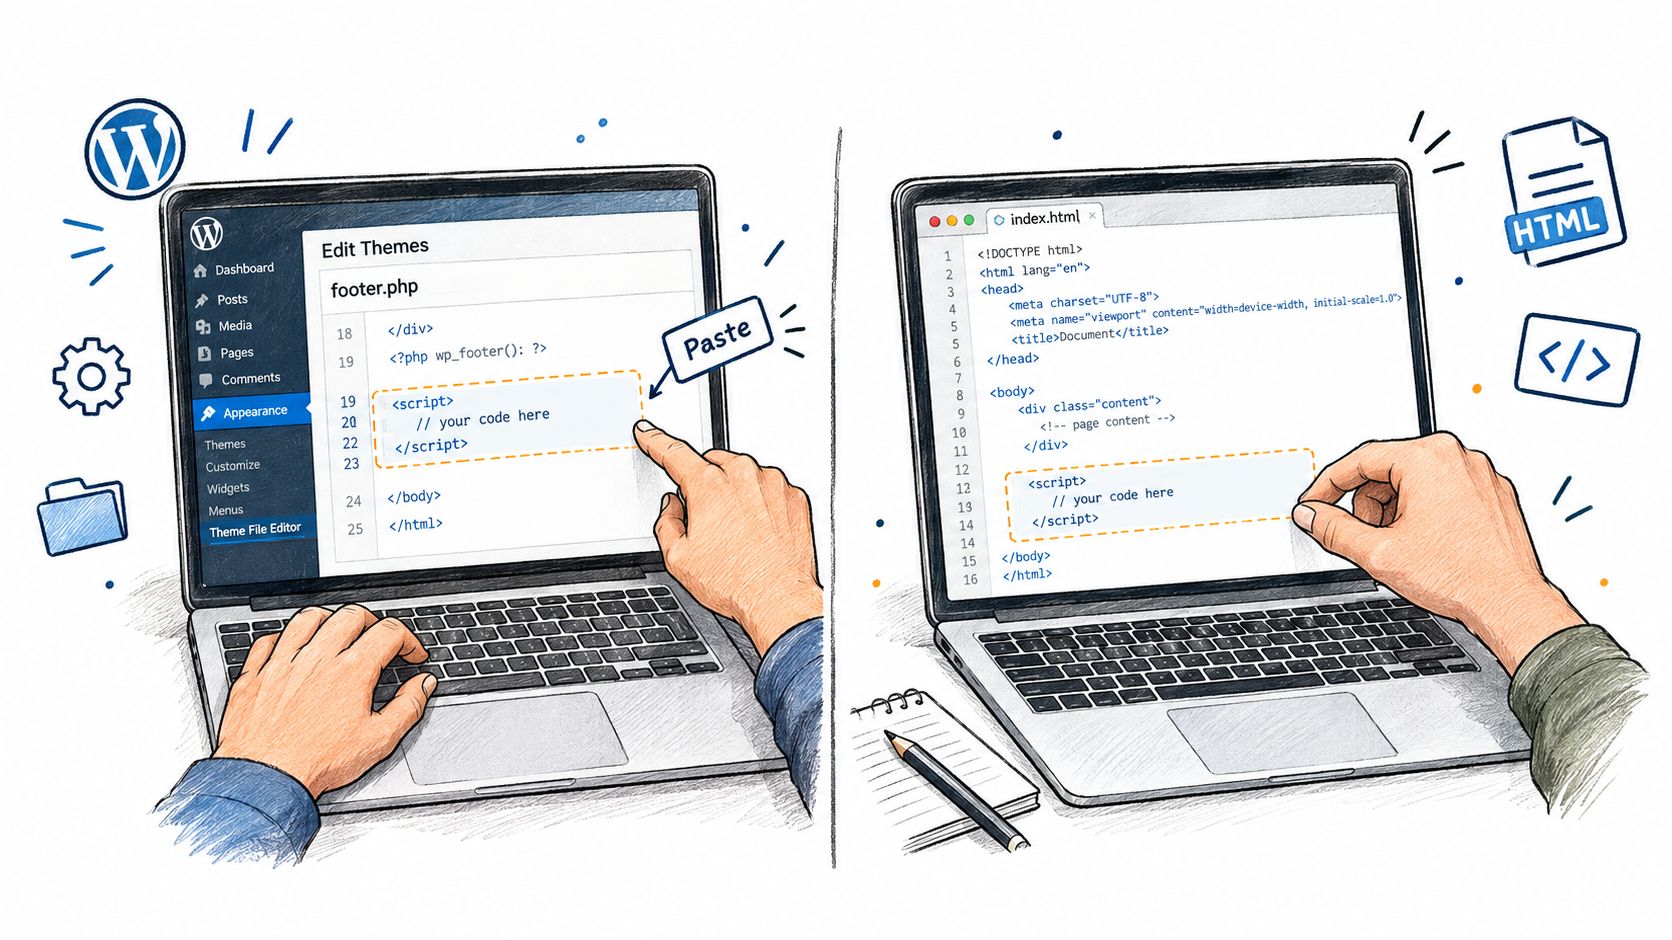
The right paste location depends on who owns the site template. A WordPress site usually has an administrative path for shared footer code, while a custom HTML site may rely on a layout file or repeated include. Both can work, but each has a common trap.
WordPress installation paths
For a SaaS marketing site running WordPress, use the least fragile route your team can support:
- Header or footer plugin: Add the script to the footer injection area, then limit it to the appropriate site scope if the plugin provides that control. This avoids editing a theme file directly.
- Theme footer template: In a classic theme, an administrator may use Appearance > Theme File Editor and add the snippet to the footer template before
</body>. A child theme is safer than editing a parent theme because theme updates can overwrite direct changes. - Custom HTML block: A block theme or page builder may offer a site-wide footer or custom code area. Use that instead of adding the snippet to a single page block.
After publishing, clear the WordPress cache and any CDN cache your site uses. Aggressive caching can serve an older version of the template, making a correct installation look broken. Check the homepage, a blog post, a pricing page, and a page that uses a different template.
Custom HTML installation paths
A static documentation site often uses a shared layout file, footer include, or build template. Add the script there, rebuild the site, and inspect the generated HTML on more than one page. If the site has no shared include, add the snippet to the template that generates each page rather than manually editing a handful of files.
This distinction matters during future publishing. A widget installed on one HTML document won't automatically appear on newly generated pages. Search the built output for the provider's script reference, then open the deployed pages in a private browser session.
The following walkthrough shows the general logic of adding an external script to a site layout.
If the widget appears on desktop but not mobile, inspect responsive CSS and any mobile-specific template. If it appears only after a refresh, check whether the script is being injected after a client-side navigation event or blocked by a consent manager.
Customizing Your Widget to Match Your Brand and Workflow
A default widget can be useful for a first launch, but visitors notice when it looks unrelated to the site. Start with the elements people see first, launcher color, position, icon, greeting, and spacing. Leave advanced triggers and complex routing until you know what questions visitors ask.
The practical trade-off is speed versus control. Keeping defaults gets the support channel online quickly and reduces configuration risk. Customizing the visible experience helps the widget feel native, while workflow settings determine whether it answers routine questions, captures a lead, or guides a new user through setup. AgentStack's appearance settings documentation provides the product-specific controls for that visual layer.
Choose settings by the job the widget must do
| Setting | Support Deflection | Lead Capture | Onboarding Help |
|---|---|---|---|
| Launcher text | “Get help” or a similarly direct support label | A prompt that invites questions from prospective buyers | “Need help getting started?” |
| Greeting | Point visitors toward documentation and common answers | Ask what the visitor wants to accomplish before requesting contact details | Offer guidance on the next setup step |
| Position | Keep it clear of support and navigation controls | Place it where it remains visible without covering conversion content | Keep it close to the primary workflow |
| Knowledge sources | Prioritize help center and product documentation | Include product, pricing, and qualification information | Include tutorials, setup material, and troubleshooting content |
| Handoff rule | Escalate when the assistant cannot answer confidently | Route qualified requests to a human inbox | Escalate account-specific or blocked setup issues |
Don't over-style the component with custom CSS before checking its built-in appearance controls. Provider CSS can be isolated, but host-page rules such as broad button selectors, fixed z-index values, or aggressive font declarations can still create visual surprises if the widget is rendered directly into the document.
Use proactive prompts carefully. A greeting that helps a visitor understand the widget is different from a prompt that interrupts reading. For support deflection, clarity usually beats clever copy. For onboarding, a short prompt tied to the current task can be more useful than a generic invitation.
Keeping Your Widget Fast and Conflict Free
A widget can be simple to install and still slow the page. Its JavaScript runs in the visitor's browser, competing for network, CPU, and rendering time with your own code. Guidance for embeddable components places the typical initial JavaScript cost of a third-party widget at about 200 to 800 KB (embeddable widget performance guidance).
Start with a baseline. Record how the page behaves before adding the embed, then test the same URL afterward with browser developer tools and Lighthouse. Check rendering, interaction responsiveness, layout stability, console errors, and network requests. A visible chat bubble does not prove that the full experience is working well.
Use a staged loading pattern
- Bootstrap minimally: Keep the initial snippet small. Do not place unrelated application logic inside it.
- Load asynchronously: Use
asyncordeferwhen the provider supports it, and load the widget after essential first-party scripts. The web.dev embed best practices explain how this limits render blocking. - Delay the heavy interface: If the provider supports a facade or click-triggered load, show a lightweight launcher first and fetch the full application when the visitor opens it. This approach can reduce the work required before interaction on a landing page.
- Isolate the component: Prefer an iframe or a strongly sandboxed component model when available. Isolation limits conflicts between host CSS, widget JavaScript, and the rest of the page.
A launcher may appear quickly while the panel continues initializing. Test both states, including the first click on a cold page. A prompt, launcher, or interface designed around the page's task should also remain responsive, as practical guidance on AI chat interface performance and design makes clear.
Check for collisions before visitors find them
Open the browser console after installation and look for JavaScript exceptions. Inspect the widget on narrow screens, at zoomed views, with keyboard navigation, and on pages containing sticky headers or consent banners. Avoid document.write, use versioned script URLs when the provider supplies them, and ensure a widget failure does not stop the host page from completing its own work.
Consent handling belongs in the loading plan. Keep the widget blocked until the visitor's choice permits its category, rather than initializing a non-essential script and trying to undo it later. Confirm that the consent manager and widget behave consistently across cached pages.
Performance rule: Compare the page with and without the embed, then test the interaction that loads the full widget. A fast initial page can still hide a slow or blocking click experience.
Final Checks and Troubleshooting Before You Go Live
A widget is ready when it appears in the intended templates, opens reliably, respects privacy controls, and gives your team a usable path for escalation. Run the checks from a visitor's perspective, not only from an administrator account.
The launch checklist
- Coverage: Open the homepage, a content page, a conversion page, and any template with a different header or footer. Confirm the launcher appears where it should.
- Mobile behavior: Test a narrow viewport and a real phone. Check that the panel doesn't cover the primary action, overflow the screen, or trap keyboard focus.
- Conversation flow: Send a known support question, an unanswered question, and a request that should reach a human. Verify the responses and handoff behavior.
- Analytics: Confirm conversation events and operational reporting appear in the provider dashboard. AgentStack provides analytics and a shared inbox for reviewing conversations and human escalation.
- Consent behavior: Initialize the consent manager before non-essential widget scripts, map the widget to the correct category, and verify that it remains blocked until the visitor's choice allows it. Guidance for HTML sites emphasizes prior-script blocking, consent mode, and category-based control (cookie consent implementation guidance).
- Caching: Purge site and CDN caches if the published template doesn't contain the snippet in the browser's deployed HTML.
- CSS and JavaScript: If the launcher is invisible, inspect z-index,
display, overflow, and console errors. If the whole page changes behavior, temporarily remove the widget and isolate the conflicting selector or script.
Consent testing deserves its own browser session. Reject non-essential cookies, inspect network requests, then repeat after granting consent. A widget that appears visually but sends requests before permission may not meet your site's privacy requirements.
After launch, review unanswered questions and handoff conversations rather than treating installation as the finish line. Those conversations tell you which documents need improvement, which instructions confuse users, and where automation should stop.
Configure the widget, place its script in your shared layout, and test performance and consent before publishing broadly. AgentStack provides an embeddable support interface with knowledge-based responses, analytics, and human handoff workflows. Visit AgentStack to create a support deployment that fits your site's brand and operational process.